Please enable JavaScript to view this site.
Cobwebb supply a command CRTTSTLIB [from v6.2.37] which will allow you to copy your existing CPPD library and restore it as a new name. It will also change all of the necessary objects such as the Cobwebb Subsystem name and Job Description to be the same as your new library name as well as making sure they all point to the new library.
Note: The CPPD folder in QDLS will also be copied and a new folder created with the same name as your new CPPD Library.
1.Sign on as QSECOFR or with a User Profile that has *ALLOBJ and *SECADM authority.
This User Profile must also be enrolled in the System Directory as the Cobwebb Server installation restores a folder, with the same name as your new library, to QDLS. To add a Directory Entry you can use the following command replacing the words in red with your own entries:
ADDDIRE USRID('User ID' 'Address') USRD('User Description') USER('User Profile') SYSNAME(*LCL)
User ID - is usually the same as the User i.e. the User Profile
Address - is usually either the System Name or the same as the User Id
User Profile - must match the User Profile that you are going to use for the installation.
2.End the Cobwebb subsystem
ENDSBS CPPD
3.Run the CRTTSTLIB command with your current CPPD library in your library list and press F4:
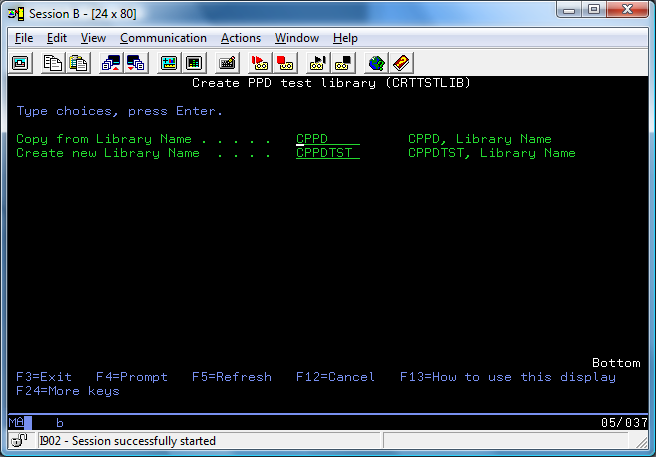
FRMLIB - Copy from Library Name. The name of your existing CPPD library.
NEWLIB - Create new Library Name. The name for your new CPPD library. Note: this library must NOT already exist.
Note: You are only allowed to create a library name of up to 8 characters as Cobwebb requires a Folder in QDLS of the same name and folder names are limited to 8 characters.
4.Press Enter
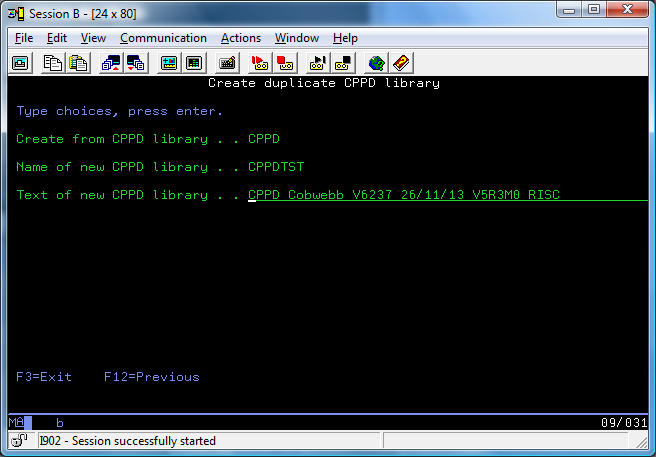
Now you can change the Text for your new CPPD library and Press Enter.
5.The wizard performs a few Pre-requisite checks like checking to see if you have the correct authority and that the Cobwebb subsystem has been ended. As the Wizard progresses you will see the different Tasks being performed e.g.
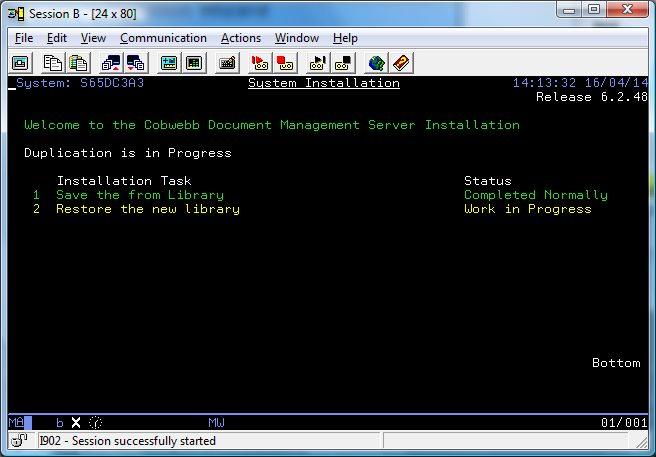
The Task that is currently being performed will be highlighted in yellow with a Status of Work in Progress.
6.When the Wizard has completed creating a copy of your CPPD library you will see a screen similar to the following:
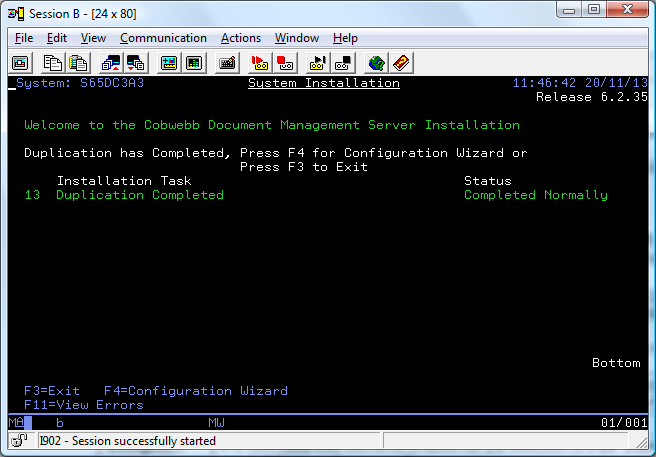
You may use the Page Up and Page Down keys to scroll through the list of Tasks to check that they have all completed normally. e.g.
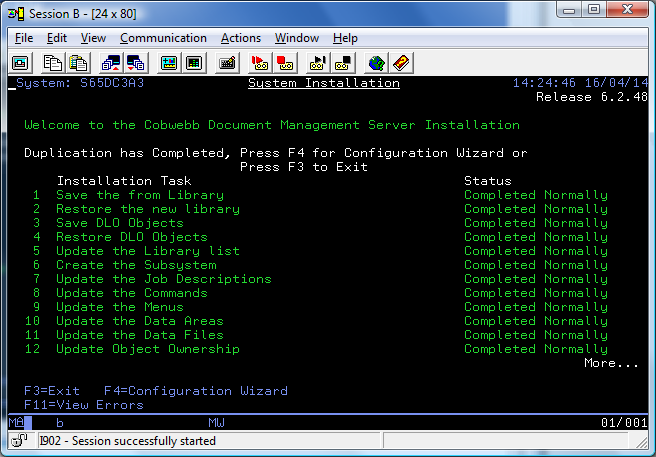
You can also do this by pressing F11= View Errors.
7.Once you are happy you can either press F4 to start the Server Configuration Wizard to configure your copied CPPD library or F3 to exit the Wizard.
